In This Issue:
- KARL DEUTSCH: LEPTOSKOP 2042 – Coating Thickness Gauge, Made in Germany
- NEW: FlawTech Oil & Gas Sector Flaw Kits
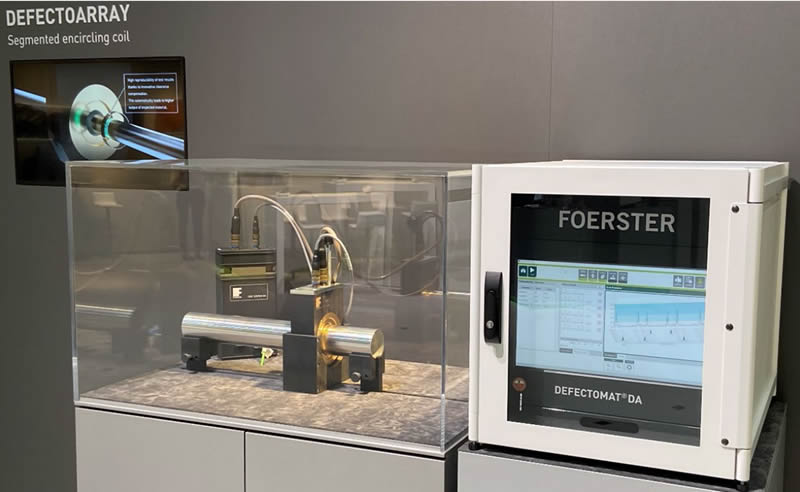
- NEW: Foerster DEFECTOARRAY Eddy current technology of tomorrow – Test Coils

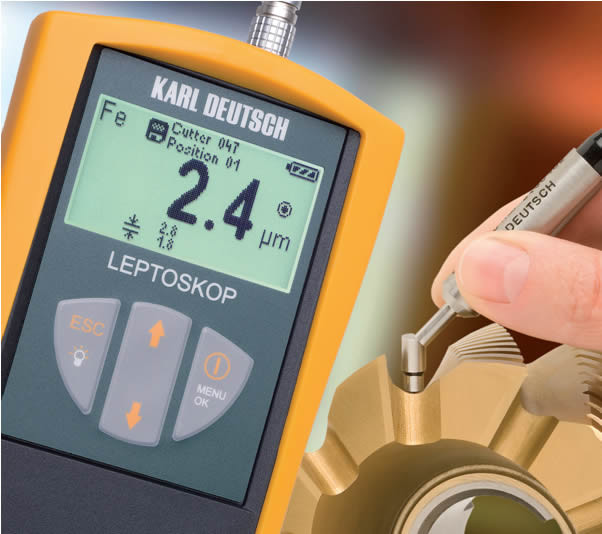
The brand name LEPTOSKOP® represents decades of experience in development of precise and reliable coating thickness measurement gauges from KARL DEUTSCH of Germany.
The advantages of the LEPTOSKOP 2042 are numerous. To find the perfect gauge for your individual needs we have developed 3 stages of expansion:
The basic gauge – strong basis for precise measurements
The software module “Statistics” – statistics and more for enhanced requirements
The software module “Statistics and Data Memory” – for your highest demands
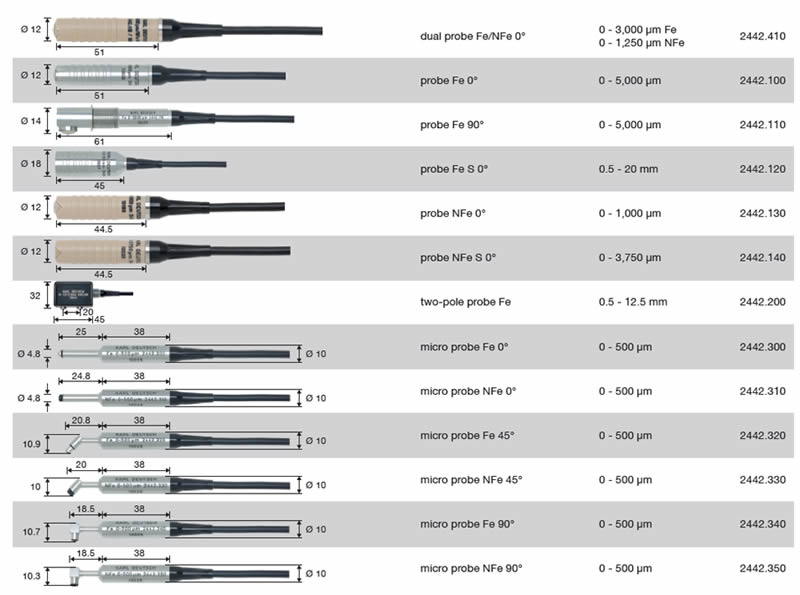
For Leptoskop 2042 a range of probes are available.
Advantages at a glance:
- Precise measurement technique
- Adjustable offset for indication of readings
- Adjustable limit values
- Calibration on unknown coating (Fe)
- Multi-point calibration
- User guidance in comprehensible text
- Graphical display with power saving backlight
- Large characters for reading of measured values
- Shock absorbing rubber holster with pop-out stand
- Measuring method according to EN ISO 2178/2360
(magnet-inductive and eddy current)
- Modern, small and lightweight
- Hotkeys
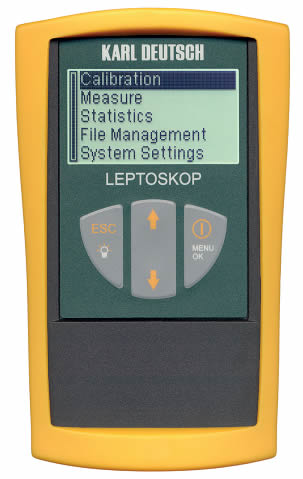
The software module “Statistics” – statistics & more for enhanced requirements of the Basic unit
- Statistical evaluations with up to 999 stored measured values
- Variable display modes for an optimal adaptation to the task:
- – All information viewable at a glance (measured value together with statistical data, minimum, maximum, number of measurements, arithmetic mean, standard deviation)
- – Measured value optionally in pointer indication, measured data and graphic representation of readings
- Keyboard lock
The software module “Statistics and Data Memory” – for highest demands of the Statistics unit
- Data storage with file management similar to Windows.
- Up to 140 files storable of 999 measured values.
- All statistical evaluations are available for each file
- Each file individually stores its associated calibration
- Calibrations from files can be stored or loaded separately
- Real-time clock

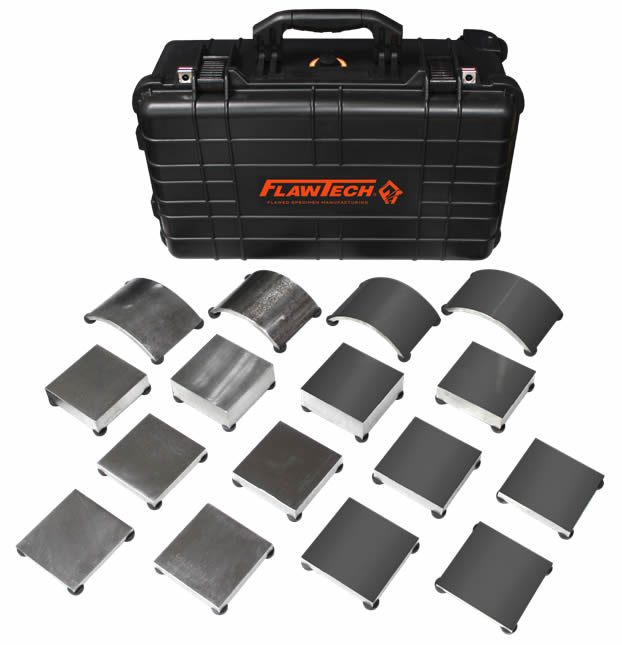
FlawTech Oil & Gas Sector UT- Thickness Kit #OGS-UT-2
This “NEW” UT Training and Testing Flawed Specimen Kit is the premier preparation tool for the API QUTE – TM and the ASNT ISQ Oil & Gas Sector UT Thickness and Corrosion exams. This kit was designed and manufactured to emulate the API & ASNT O&G-UTT-4 Rev 3 Protocols.
The Kit assists in the training and testing of UT Technicians for Thickness and Material Loss evaluation.
There are 16 Individual Specimens with one flaw type each. Seven different thickness in plate and pipe ranging from;
0.25” to 1.50”.
Kit Specifications: Total of 16 Specimens. Material: Carbon Steel, A36 Plate and A106B Pipe SMLS
(x2) 0.25”T x 4” x 4”
(x4) 0.5”T x 4” x 4” (2-Blanks)
(x2) 0.75”T x 4” x 4”
(x2) 1.0”T x 4” x 4”
(x2) 1.5”T x 4” x 4”
(x2) 6”Sch40 (0.280”) x 4” ~180˚ segment
(x2) 8”Sch40 (0.280”) x 4” ~90˚ segment
The host side of the plates and pipes will be coved with a “removable” cover plate
Plates and Pipes will be uniquely identified with an engraved serial number. Half of the Specimens will be coated with a two-part fusion bonded epoxy between 10-50 mils. The remaining half of the specimens will be left uncoated.
Flaws:
1x randomly placed flaw per specimen, for a total of 14 flaws. Flaws will consist of wall loss due to corrosion or erosion, mid-wall laminations or no damage. No test specimen shall have a flaw type from more than one of the three listed flaw type conditions. Wall loss may take the form of one of more of the following modes:
General or Large Area Wall Loss, General Wall Loss with Pitting, Isolated Pitting, Localized Wall Loss, Erosion, Mid-Wall Laminations (Single and Multiple). Half of the Specimens will contain a minimum of one blank quadrant each containing no damage. The through wall depths of the indications will vary but the target depths will range from ¼, ½ & ¾ T.
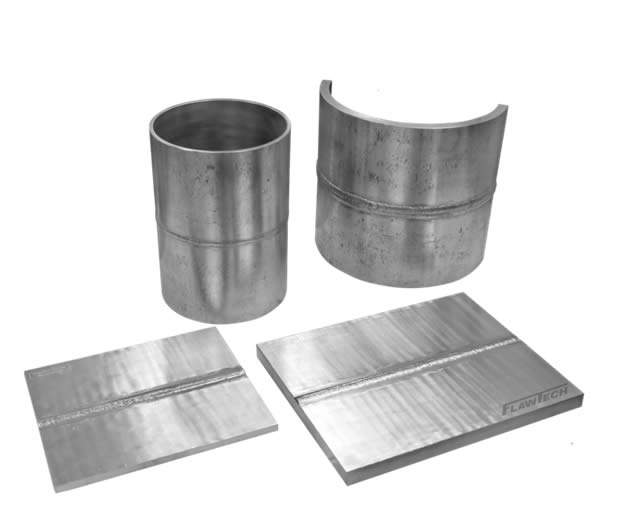

FlawTech Oil & Gas Sector UT – Shear Wave Kit (Part #OGS-UT-1)
This “NEW” UT Training and Testing of Flawed Specimen Kit is the premier preparation tool for the API QUTE – Detection, QUSE – Sizing and the ASNT ISQ Oil & Gas Sector Shear Wave exams. This kit was designed and manufactured to emulate the
API & ASNT OGUTSW4 Rev 00 Protocols.
The Kit assists in the training and testing of UT Technicians for both Conventional and PAUT.
There are 12 Flaws which cover both fabrication and in-service indications to be evaluated in four specimens. It also comes with our complete document package included in the purchase price.
Material:
Carbon Steel, A36 plate and A106B pipe SMLS
Kit Specifications: 4 specimens Material: Carbon Steel, A36 plate and A106B pipe SMLS
(1) Plate @ 1.0” T x 12” x 15” (weld length)
(1) Plate @ 0.25” T x 10” x 12” (weld length)
(1) Pipe (360°) @ 8” Sch20 (0.25” WT) x 12”
(1) Pipe (180°) @12” Sch80 (0.688” WT) x 12”
Flaws:
Total of 12 flaws
Flaws are randomly placed ~2-4 each specimen.
Flaw placements will be mixed for multiple kit purchases
Final Documentation:
Includes Certificate of Conformance, “As Built” CAD drawings, Measuring & Test Equipment Certificates and Test Sheets


FOERSTER Patented sensor technology for clearance compensation
With their newly developed segmented encircling coil, FOERSTER offers cutting-edge sensor technology for significantly better non- destructive materials testing. Designed in several segments, each with its own clearance coil, the patented DEFECTOARRAY sensor reliably detects defects, independent of whether the material is guided centrically or eccentrically. The innovative clearance compensation means that non-critical defects arising from eccentric material guidance do not cause the material to be rejected. This results in higher output of the inspected material.
Precise recording of defect positions
Highly sensitive multi-channel inspection enables very precise defect location on tubes or bars. The defect position is recorded not only in the longitudinal direction, as before, but now also in the circumferential. This means that, post-inspection, you can quickly locate the defects in the material – as well as draw valuable conclusions about the production process.
The benefits
- Significantly higher reproducibility of test results thanks to innovative clearance compensation.
- Clearance compensation reduces negative influences brought by dimensional variations and eccentricity.
- Exact defect locations, specified in both longitudinal and circumferential position.
- Reduced risk of mechanical damage to test material and sensor
- Higher sensitivity compared to conventional encircling coils for reliable detection of smallest defects in Tubes and larger Rods.
- Coil and nozzle changeover only necessary in 3 to 5 mm increments, depending on material diameter.
- Compatible with all existing mounts and magnetizing yokes from FOERSTER.
- Available in three sizes: 18-45 mm, 46-100 mm & 104-180 mm.
